Users
1. Introduction
Our users are the center of our product to provide all-time assistance to your customers you can deploy a chatbot on your website/channel. But that’s not it, if we can not track the usage to understand, maintain, improve user experience then eventually we may end up losing the existing users or block the entry of new users on our product. floatchat makes it easier for its customers to track user behavior and improve the user experience of their users.
You can simply click on the Users tab and go to the user’s page of the floatchat platform. Here you can find the listing of users of your bot. It helps you drill down to a specific user and do a one-to-one chat when needed. It also shows you all the details about the user including name, gender, and a graph displaying interactions over time.
2.Accessibility
The user’s page is accessible by clicking on the Users tab on the left panel in your portal.

3. Terms and definitions

4. Users
4.1 Users Panel

On this screen, you can see
Profile pic: This image is retrieved from the Facebook profile of a user if he is using the bot on the messenger platform. For all other cases, the image shows the initials of the name.
Name: This name is retrieved from the user profile if the user is using the bot on Facebook messenger or is requested using a request user data node/identity node in the bot flow.
A bot builder has to select the option of “update as username” in the Request user data node or select update for a user name when using an Identity Node.
The user name of any incoming user can be retrieved from the platform or can be system generated.
Following are the steps followed to retrieve/assign a username
- If First name Last name is retrieved from the platform then the user name is ‘First Name’ +‘Last Name’
- If either First Name or Last Name is available then it is used as the user name.
- If the user registers on a platform with a channel with a phone number then the phone number is displayed as a user name
In case no information is available then the system generates a random combination of first.
Platform: This shows the source platform from where the user used your bot. It is displayed using the symbols represented in the deploy section
Last Active: This is to track the activity of the user on the platform. This gives information when was a particular user last using your bot on the given platform
Joined on: This marks the day when the user’s the very first interaction with your bot on the given platform.
Live chat: Be available to help your user. This can help to guide a user for a critical step in the bot flow or to help the user if the bot is unable to handle the user query by clicking on the live chat option. You can directly interact with the user.
4.2 Configure Columns
You can add or remove the columns visible in the Users section. Columns can include standard user attributes provided by floatchat or the custom attributes you have added for your bot.
To be able to configure the columns, Click on 3 dot icon on top right and Configure Columns

When you do that, a modal box will open up allowing you to select the columns needed.
Check or uncheck against the column headers check box and click on Apply. You will be allowed.

4.3 Filters
Use filters to display only specific users based on specific conditions. Click on Select/Clear Filter to see the dropdown for User Filters. This will allow –
- ‘Save’ Currently Applied Filter as a Segment
- ‘Clear’ Currently Applied Filter
- ‘Remove’ any Unsaved Filters
- ‘Create’ new Filters, and
Note: Filters are for temporary use within the session. Once you save a Filter, that would get saved as a Segment and would be available for future use by you and other users with access to the Bot
4.4 Creating a New Filter
Click on New Filter for creating a new filter. Once you do that, you will get the modal window for creating a new filter. You can define conditions based on user system attributes or your own custom attributes defined in the bot.
You can use AND, OR, and CUSTOM for creating a filter expression. Click on Apply to see the filtered view.
5. User Details
5.1 User Interaction History
When a bot owner clicks on a user name. They can see the below screen which displays user interaction history.
On this screen, you can see
User Image: Since in this case, the image is not available we can see the initials of the name.
Platform information: In the superscript, we can see the symbol of the website bot which shows the user used the bot on a web

5.2 Custom User Attributes
In the image, you can see the attributes information requested in the bot flow from the user and the value entered by the user. These are all the attributes created by the user.

5.3 Interactions over Time
This graph shows user interaction spread over different days. This represents a cumulative number of interactions that tak

5.4 Conversations
This can be used to track interactions of potential customers/Hot leads. This window displays a user’s interaction from the day of joining till the present time. This can also be reviewed from time to time for random checks if the bot is able to answer your customer’s queries appropriately from time to time. This conversation can be used to identify the issue and improve in case of negative feedback.

5.5 Conversation Logs
For all users who have interacted with live chat or human agents, conversation logs are stored and displayed. These logs cover the user’s journey from being assigned to an agent, transferred and resolved.
Owners and Supervisors can navigate to the particular conversation under Users, and click on option

6. Reports
6.1 User List
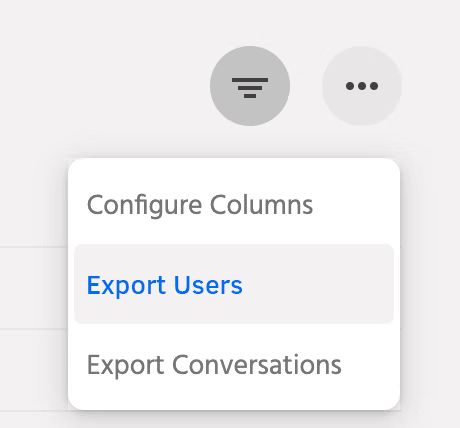
A list of users that have interacted with the bot can be exported from the portal. The columns included in the export are based on the configured columns on the Portal. So to export a different set of attributes for your users, you can always change the configured columns and export the report again. Note that depending on the subscription plan, the data could be stored for different times on the portal.
A message ‘Download will begin shortly’ will be displayed. Click on Export History tab.
Once on the Download Screen, Click on the Download button to download the zip file, you can open.

6.2 Conversations History
You can also download a consolidated user chat history for the last 90 days from the portal. To get this report, click on Export Conversations
A message ‘Download will begin shortly’ will be displayed. Click on Export History tab.
And finally, click on the Download button to download the zip file, you can open this zip file to extract.
The exported report is of the below format,
Timing of the message Sender (Bot, User or Agent) User Id Platform Message Type