How to set up discount pop-ups
1. Introduction
Conversion triggers can engage your customers by showing discount pop-ups based on user activity.
2.Create conversion triggers for your store
A chat trigger has the following components:
- A goal that you as a store owner wants to achieve (ex: Show promo code to a visitor)
- The event on which a trigger needs to be initiated: Remove from cart, Exit intent
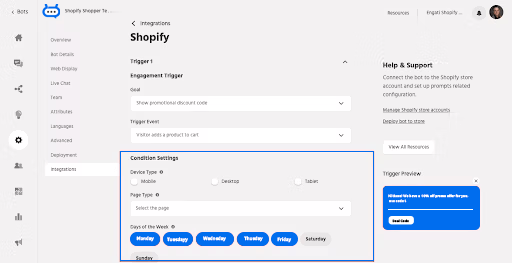
- Conditions to launch the trigger after the event: Days, Device type (Desktop, Mobile, Tablet)
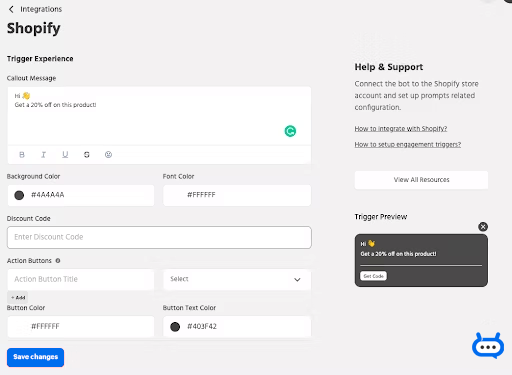
- Trigger experience: Demo display of the trigger you’ve set up
2.1) Create your first trigger
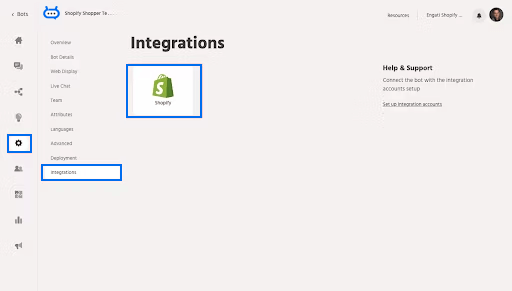
Go to configure > Integrations > Shopify > Triggers

2.2) Click on the Add Trigger button

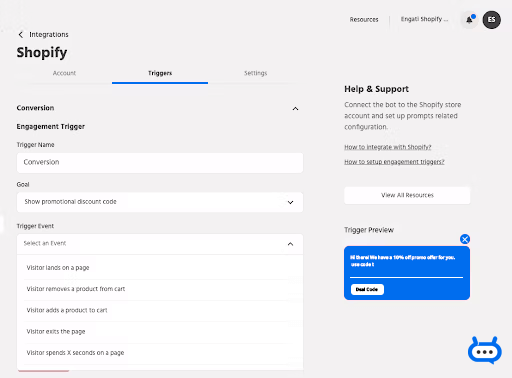
2.3) To Configure a trigger you need to choose a goal and an event (on which the trigger will be shown)
Triggers can be added for the following events
2.3.1 Visitor lands on a page
2.3.2 Visitor removes a product from the cart
2.3.3 Visitor adds a product to the cart
2.3.4 Visitor exits the page
2.3.5 Visitor spends X seconds on the page

2.4) Once the goal and the event are selected, you can select from a set of conditions on which you want to trigger (Ex: Days, Device type, etc).

2.5) Select the Page type. To trigger the pop-up for all pages select Any. Other options available are Product pages and collection pages. For specific pages, you can add the URL for the page.
2.6) After configuring the conditions, you can set your callout message that will be shown to the visitor when this trigger is initiated.

2.7) Discount codes have to be set up in your Shopify admin console. You can access the discount codes in the Discount section.

Add the discount code set up here, on the Floatchat portal, and click on Save Changes.
Note: You can create a maximum of 7 triggers per account. In case there are 2 triggers created that might get overlapped, the trigger with a higher priority will be shown.
Priority can be set by dragging the triggers above the other
