Campaigns
1. Introduction
1.1 Availability Plan
1.2 Availability Platforms & Channels
Floatchat provides Campaign Support for a good range of Chatbot Channels including –
Facebook messenger
Slack
Line
Website (& Mobile SDK) – Messages delivered if Chatbot is active during the broadcast
1. Introduction
2.1 Add New Campaign
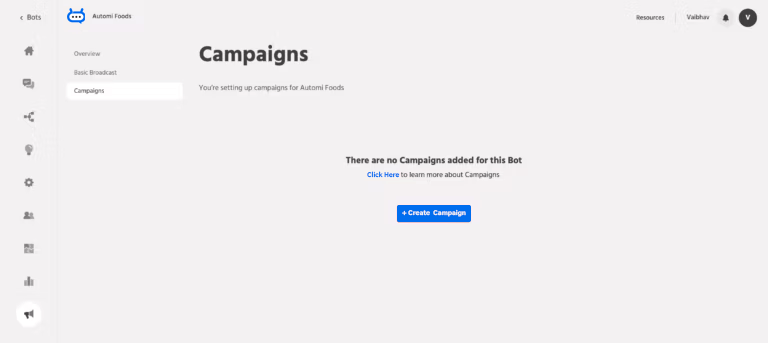
Campaigns can be managed from the Broadcast -> Campaigns menu option.
In this workflow, you can see a list of all your setup campaigns as well as create one via the Create Campaign option.
Each campaign entry displayed here also shows the number of subscribers for each campaign as well as the messages sent as part of this campaign. You also have the option to edit/rename or delete a campaign from here
2.2 Adding Steps
Once a campaign has been created, comes the part of adding steps. On clicking on the created campaign, you go to the campaign editor where you can manage each step/message of a campaign.
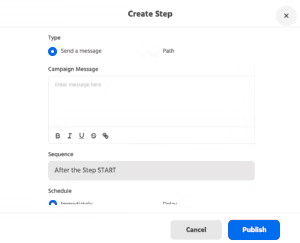
Step creation involves the following options for configuration –
– Type: You can set up whether this step just sends a message or triggers a path and based on that set the appropriate message or the path to be triggered.
– Schedule: Then, the important option for the schedule – either the step can be triggered immediately following the previous step or after the set delay. The delay can be configured in terms of hours or minutes from the previous step
– You also have the option to control the delivery of these campaign messages on specific days – for example, you may not want to send messages on a weekend or otherwise.
Note: For the first step, the delay would be counted from the subscription time of the user to the campaign

2.3 Campaign Subscriptions
Floatchat allows you to easily subscribe or unsubscribe users interacting with the chatbot to specific campaigns. This allows you to easily target the campaign broadcasts to specific segments of users who have subscribed to a particular campaign.
To aid with campaign subscriptions, the below conversation flow nodes are available –
– Subscribe Campaign
– Unsubscribe Campaign
The usage of these nodes is in line with their naming and allow you to subscribe or unsubscribe a user to/from a campaign based on a conversation flow that they go through

You can download the campaign subscribers as a CSV file. This would include data around the user (id, name, email, number as available) as well as other information like channel, subscription timestamp, etc.
2.4 Tracking
Once a campaign is live, you also get to track how many messages were sent, delivered and read by your chatbot users. Note that delivery and read receipts tracking is a channel-dependent feature and might be inconsistent if there are multiple channels configured including some that don’t provide this data
2.5 Download subscriber list
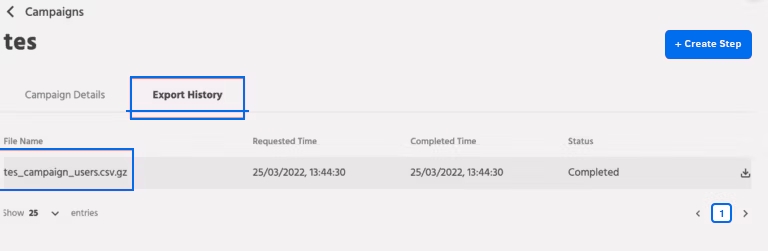
As part of the Campaigns, users will be able to download the subscriber list by clicking on the subscriber count as highlighted in the image. The downloaded file will be available as a csv and will have the following information,
- User id
- User name
- Email
- Contact number
- Platform/channel (on which the broadcast was sent)
- Time

The downloaded file will also be available on the export history tab for user’s reference as shown in the image
Campaigns on Engati, offer rich capabilities to design and build automated marketing campaigns to nurture your leads as well as handle a number of re-engagement use-cases.
A good way to understand campaigns is to think of it as similar to email drip campaign but with messaging for the chatbots. With increased flexibility around user segment targeting based on subscriptions as well as greater control over timing of successive messages for a specific user, campaigns is a significant step up on the Broadcast capabilities. This makes use of campaigns a perfect setup for optimising conversions via chatbots.
1.1 Availability Plan
Campaign Management as a capability is available to Engati customers under Business Plan or higher.
Also, Campaigns can be managed from the Broadcast -> Campaigns menu option.
1.2 Availability Platforms & Channels
Engati provides Campaign Support for a good range of Chatbot Channels including –
Facebook messenger
Slack
Line
Website (& Mobile SDK) – Messages delivered if Chatbot is active during the broadcast
2. How it Works
2.1 Add New Campaign
Campaigns can be managed from the Broadcast -> Campaigns menu option.
In this workflow, you can see a list of all your setup campaigns as well as create one via the Create Campaign option.
Each campaign entry displayed here also shows the number of subscribers for each campaign as well as the messages sent as part of this campaign. You also have the option to edit/rename or delete a campaign from here
2.2 Adding Steps
Once a campaign has been created, comes the part of adding steps. On clicking on the created campaign, you go to the campaign editor where you can manage each step/message of a campaign.
Step creation involves the following options for configuration –
– Type: You can set up whether this step just sends a message or triggers a path and based on that set the appropriate message or the path to be triggered.
– Schedule: Then, the important option for the schedule – either the step can be triggered immediately following the previous step or after the set delay. The delay can be configured in terms of hours or minutes from the previous step
– You also have the option to control the delivery of these campaign messages on specific days – for example, you may not want to send messages on a weekend or otherwise.
2.3 Campaign Subscriptions
Engati allows you to easily subscribe or unsubscribe users interacting with the chatbot to specific campaigns. This allows you to easily target the campaign broadcasts to specific segments of users who have subscribed to a particular campaign.
To aid with campaign subscriptions, the below conversation flow nodes are available –
Subscribe Campaign
– Unsubscribe Campaign
The usage of these nodes is in line with their naming and allow you to subscribe or unsubscribe a user
You can download the campaign subscribers as a CSV file. This would include data around the user (id, name, email, number as available) as well as other information like channel, subscription timestamp, etc.
2.4 Tracking
Once a campaign is live, you also get to track how many messages were sent, delivered and read by your chatbot users. Note that delivery and read receipts tracking is a channel-dependent feature and might be inconsistent if there are multiple channels configured including some that don’t provide this
2.5 Download subscriber list
As part of the Campaigns, users will be able to download the subscriber list by clicking on the subscriber count as highlighted in the image. The downloaded file will be available as a csv and will have the following information,
- User id
- User name
- Email
- Contact number
- Platform/channel (on which the broadcast was sent)
Setup
1. Deploy your bot on the WhatsApp channel.
2. Once the bot is deployed the import contact list icon would be visible on the left side.
3. Navigate to Contacts>Import Contact List
4. Contact List format
- Only mandatory column in a Contact List is phone_no which will include the phone numbers of the contacts (your target audience).
- Other columns that can be included are first_name, last_name, email, username, city, state and country
- A header row will always be present
- Without a header row, an error would occur while uploading
- Validation would be performed for phone_no and other mentioned columns above – so if an incorrect email is entered in email column, then an error would occur
5. Additional attributes in the contact list
- In addition to the column headers above, additional attributes can be included and used in the contact list by using a header in format attribute_name||TYPE where TYPE can be TEXT, NUMBER, BOOLEAN, DATE, TIME.
- If TYPE is not included, then default TYPE is TEXT
Here you get two options:
- Single Country
- Multiple Countries
Single Country :
- Country: The selected country’s code will automatically attach to the uploaded contact list. (e.g: India – +91)
- Upload Contact List: You can upload the ‘xlsx or CSV’ format file containing up to 50k contacts. The default limit would be 10k.
- Country: The selected country’s code will automatically attach to the uploaded contact list. (e.g: India – +91)
- Upload Contact List: You can upload the ‘xlsx or CSV’ format file containing up to 50k contacts. The default limit would be 10k.
- Requested Time: The time at which you uploaded the contact list file.
- Completed Time: The time at which the list got uploaded successfully.
- Total Records: Number of total contacts in the uploaded file.
- Error Count: The number on which WhatsApp is not enabled or if it’s a Wrong formatted number, will get counted as an Error Count.
- Status: The upload status of your file would be displayed.
Run Broadcast
In the Import contact list option, you get a direct button for running broadcast.By clicking on the ‘Run Broadcast’ button it will redirect to the ‘Create New Broadcast’ window.
Select the user group as ‘Contact List’ and select the target contact list from the dropdown menu.
You get the option of adding the contact list directly while creating a new broadcast.A similar panel you would see after clicking on the ‘Import contact list’ button.
Using Custom Attributes
The custom attributes included in the contact list can be used to persozalize the content of the template.
For example, if amount_paid||NUMBER is specified as a header, then this value can be used in the template by using {{amount_paid}} from the list of attributes at the apporpriate place in the Template